Tuesday, July 1, 2014

Tea Towel Pillowcases


Because travel is such a big part of our lives we have become totally OBSESSED with maps or anything that has any sort of map on it! When we visited Portland we passed by a little independent fabric store that I had to go in! The fabric was all adorable (and expensive) so it was just fun to browse. On my way out I found a little tea towel that had a map of Oregon and Washington. It was inexpensive and soooo cute and I figured I could find something to do with it once we got home. Ever since then I look for them everywhere I go and I was lucky enough to find another one in London!!!


I decided to use the tea towels to make some pillowcases to cover some throw pillows for our couch and bed. It was super quick and easy and I used leftover fabric I already had at home for the back contrasting fabric!

All I did was cut my contrasting fabric to fit my tea towel +10 inches to the length and then cut that piece in half.


I then folded those edges over twice and stitched them down to make a little lip. I then sewed right sides together with those two lips overlapping about three inches. Because of that extra lip I can take the case on and off of my throw pillows to wash them!


It was so simple and fun way to display some of our travels!


Monday, June 23, 2014

Tie-Dye American Flag Shorts


I have seen tie-dye done with sharpies and rubbing alcohol all over the place and I thought I would try it out! It was soooo easy and fun. My project was a little time consuming but depending on how much color you are adding it could take you less time.


All you need is your piece of clothing, sharpies and rubbing alcohol. I used a pair of my old white running shorts that I didn't really wear anymore but you can use anything as long as the sharpies will show up!


First, you need to draw your design. I just used dots instead of coloring it all in to save ink. Once you add the rubbing alcohol it will bleed (so much) so you don't need to color it all the way in. I almost didn't go any further after this step because I liked how it looked with all the dots, but I decided to just go for it and I was really happy with how it turned out!


Once you have it all colored, put your rubbing alcohol in a spray bottle and spray it over your color. It takes a second for it to start to bleed and the more you spray the more it will bleed, so start out slow!


Once you are happy with the outcome throw it in the dryer on high heat to set the color and enjoy!

Thursday, June 19, 2014

One Step T-shirt Headband

This morning Jessica and I taught swimming lessons together for a few hours, I was wearing one of my t-shirt headbands and she commented that she liked it! I told her I had a whole bundle of t-shirts we could headband-ify if she was interested!!


So we went back to my house and in the matter of an hour we had about 16 new headbands each as well one for each of our other sisters!


All you do is lay out the t-shirt and cut it as wide as you want. We got about 4 or 5 from each t-shirt so we are totally stocked up. Because of how long they are we either wrap them around our heads twice or we cut them and tie them! 


These bad boys are great for the summer when you don't want to fuss too much with your hair! They are great for working out as well as swimming! I think I might make a bunch for my Ragnar team for the race next week!

Wednesday, June 18, 2014

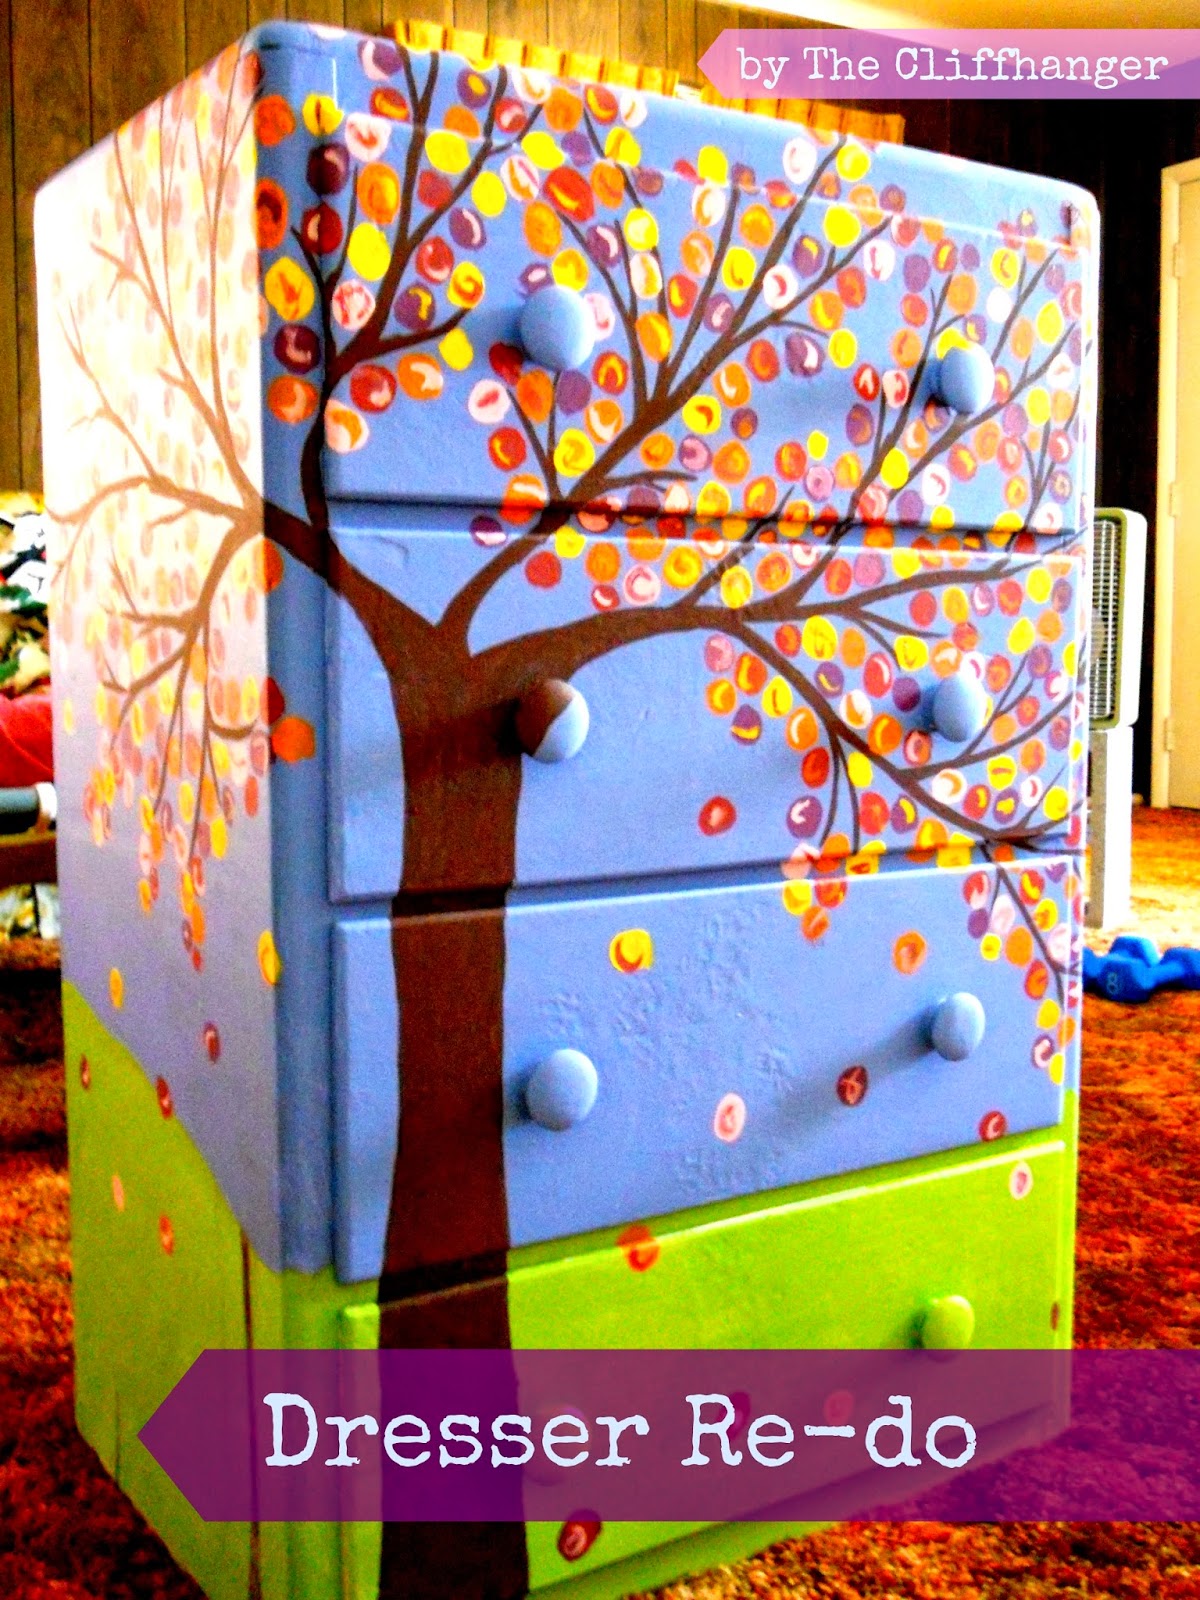
Tree Dresser Re-do!

We are throwing it back with this post to 2011 (hence the old school photos) when I refurbished my old dresser! I used cheapo acrylic paint from Walmart in assorted colors and then sealed it with polyurethane once it was dry.


The dresser used to be white, so I started by painting the whole thing blue, I then added green around the bottom as my grass. Then I put on the tree trunk and the branches. I didn't add much detail to the trunk or the grass because I wanted the focus to be on the leaves! Sorry about the poor photo quality, I took these with an OOOOOOld school flip phone!


I had a really hard time deciding which color family to do my leaves, soooo I kinda just used all of them! I mixed and matched colors that you wouldn't normally see on a tree and I am very happy with how it turned out.


I then let it dry and sealed it! Easy and so fun!! I want to do it again but I don't have room!

Lower Calf Creek Falls

As promised here is a post about our hike at Lower Calf Creek Falls. We decided to do this hike on a whim the same day we hiked the Wave. These two hikes are very different. The Wave is red rock, very dry and has no plant life. Lower Calf Creek had trees and water, and we loved it!


Lower Calf Creek is about a 5 mile round trip hike, we had heard that there was a little waterfall at the end so we were excited to dip our toes and cool off a little! We felt like we had been going for awhile with no waterfall in sight when all the sudden we entered into a little grove and right there in front of us was our waterfall, but it was not a the little waterfall we had expected! It was HUGE and so beautiful, the water was freezing but we couldn't help but take a dip.


After the heat of the red rock from earlier we were loving the water and the shade, we stayed and played for awhile until we got to cold, hungry and tired to swim any longer.


I love these peeps and their sense of adventure!


After our swim we headed back to the cars.


It was so amazing to see two such different places in one day so close together. Utah is amazing for stuff like this cause we've got it all!

photos by David McClellan

Tuesday, June 17, 2014

Hiking the Wave

Over the past couple of years I have found so much joy in hiking and exploring areas here in Utah as well as outside of Utah. I have made so many friends and seen so many beautiful things by going on these hikes. 

A few years ago my good friend, Brad (who is now my husband) had been chosen to receive six permits to hike The Wave in Southern Utah. Because of the landscape of this hike they only allow 20 people to hike it per day and to get permits you have to enter a lottery. Brad had tried for three summers to get permits with no luck, so when he found out he was chosen this time it was a big deal!


So six of us hopped in the car on a Friday evening and made it to Kanab around midnight. We all squeezed into one hotel room where we had a short night of not so great sleep! Nevertheless we woke with excitement early to head to the bottom of our 6 mile round trip hike. It was the middle of June in Southern Utah and we were hiking across the border to Arizona, so even at 6:00 am IT WAS HOT!

We had plenty of water, a map and we were ready to go. This hike doesn't have a marked trail and you have to be very careful not to go off course. We had heard of hikers getting lost and suffering from heat exhaustion, but the map helped to point us in the right direction and we luckily had no trouble finding our destination.


The landscape that we saw while hiking was beautiful red rock but it did not prepare us for what we would see when we reached the Wave. It was like nothing we had ever seen before! It was so vibrant and so beautiful.


We stayed and explored the area for awhile before heading on our three mile journey back to our car. We took lots of pictures and we thoroughly enjoyed this (maybe) once in a lifetime opportunity.


I don't know if it was because of sleep deprivation or the heat or if we were just crazy, but instead of heading straight home we found another hike to do, because, I mean.....why not? We are young! We only live once right! Stay tuned for a post about our hike to Lower Calf Creek Falls.

American Flag Door Hanger

What better way to start off The Cliffhanger than with this easy tutorial for an American flag door hanger!


I always feel very patriotic in the summertime and inspired to do American flag themed crafts, what with July 4th and Pioneer Day (Utah) both in the month of July. I made this in about half an hour from materials I already had! so it cost me $0!

All you need is ribbon and/or fabric scraps, a hanger and a pair of scissors.


First you need to decide how long you want the flag to be, I wanted mine to be about 20 inches from the base of the hanger to the bottom of the flag. Then cut strips of fabric that are the length of the flag times two. Cut them double the length of the flag so you can drape it or loop it over the hanger. I cut from a variety of fabric patterns and textures to help mix it up a little. 

I then cut the blue fabric half the length of the red and white fabric. I cut mine in different widths to add to the variety.

Now you just tie them to the hanger! I looped mine, but you could tie them or sew them or do whatever your heart tells you!


After spending time in Europe I am especially grateful for this country and the freedom that we enjoy. I am also grateful for free water with ice at every restaurant you go too... 'Merica.'