Showing posts with label Crafternoon. Show all posts

Thursday, January 8, 2015

Randall Family Cleaning Schedule

I have never felt as wifely as I felt while making this cleaning schedule, what has happened to my spontaneous, adventurous life of just cleaning all willy nilly!?! As part of my New Year’s resolutions I decided to make a cleaning schedule as well as a schedule for buying food storage items (a later post). 

Some times when I look at my messy house and all that I need to get done it feels impossible, but once I put it into a schedule like this it feels much more possible! And of course making the schedule gave me the opportunity to make it cute!


Monday, December 15, 2014

Twine Letter!!

This post is long overdue! In October, Brad went to Orlando for a work conference and sadly I wasn't able to join him this time. So while he was gone I went up to Logan to visit my mom and sisters and we had an all day CRAFTERNOON! We spent way too much money on supplies and we went a little crazy. One of my favorite things we made was the twine letter to hang on the door!


It was so easy (a little time consuming) and we were so happy with how they turned out. My mom made one as well and later on I helped my mother-in-law and two sisters-in-law make some as well. We got the letters at Hobby Lobby because that is the only place we could find the really big ones locally. We then just used hot glue and jute and bought a ready made embellishment! 


All you have to do is wrap the twine around the letter, in a few places you have to get a little creative but it is pretty self explanatory! 


We also made it so that the embellishments could be removed so you could change them for the season or holiday! This is the one my very talented mother-in-law made! I love how she styled it for Christmas!!


If you have any other questions about this project just let me know!!

Tuesday, July 29, 2014

DIY Canvas Sign

It has been a few weeks since I have been able to post anything! Summertime always gets so crazy with all the camping, swimming, running and road trips we love to take. In the past few weeks I have participated in my first Ragnar Relay Race as well as my first half marathon in Morgan Valley, both alongside my husband and both awesome experiences!


Some where in between all the madness I found the time to make a little canvas sign for one of my bookshelves. I made one in February for Valentines Day and I was long overdue for a summertime sign.


It was super easy and I did it all in about 1 hours time (would have been less but the paint had to dry). All I used was a 12 X 12 canvas, acrylic paint and sharpies.


I painted the canvas all one color then I just eyeballed my pattern but you could always use a stencil as well.


Super easy and it adds a nice touch!

Tuesday, July 1, 2014

Tea Towel Pillowcases


Because travel is such a big part of our lives we have become totally OBSESSED with maps or anything that has any sort of map on it! When we visited Portland we passed by a little independent fabric store that I had to go in! The fabric was all adorable (and expensive) so it was just fun to browse. On my way out I found a little tea towel that had a map of Oregon and Washington. It was inexpensive and soooo cute and I figured I could find something to do with it once we got home. Ever since then I look for them everywhere I go and I was lucky enough to find another one in London!!!


I decided to use the tea towels to make some pillowcases to cover some throw pillows for our couch and bed. It was super quick and easy and I used leftover fabric I already had at home for the back contrasting fabric!

All I did was cut my contrasting fabric to fit my tea towel +10 inches to the length and then cut that piece in half.


I then folded those edges over twice and stitched them down to make a little lip. I then sewed right sides together with those two lips overlapping about three inches. Because of that extra lip I can take the case on and off of my throw pillows to wash them!


It was so simple and fun way to display some of our travels!


Monday, June 23, 2014

Tie-Dye American Flag Shorts


I have seen tie-dye done with sharpies and rubbing alcohol all over the place and I thought I would try it out! It was soooo easy and fun. My project was a little time consuming but depending on how much color you are adding it could take you less time.


All you need is your piece of clothing, sharpies and rubbing alcohol. I used a pair of my old white running shorts that I didn't really wear anymore but you can use anything as long as the sharpies will show up!


First, you need to draw your design. I just used dots instead of coloring it all in to save ink. Once you add the rubbing alcohol it will bleed (so much) so you don't need to color it all the way in. I almost didn't go any further after this step because I liked how it looked with all the dots, but I decided to just go for it and I was really happy with how it turned out!


Once you have it all colored, put your rubbing alcohol in a spray bottle and spray it over your color. It takes a second for it to start to bleed and the more you spray the more it will bleed, so start out slow!


Once you are happy with the outcome throw it in the dryer on high heat to set the color and enjoy!

Thursday, June 19, 2014

One Step T-shirt Headband

This morning Jessica and I taught swimming lessons together for a few hours, I was wearing one of my t-shirt headbands and she commented that she liked it! I told her I had a whole bundle of t-shirts we could headband-ify if she was interested!!


So we went back to my house and in the matter of an hour we had about 16 new headbands each as well one for each of our other sisters!


All you do is lay out the t-shirt and cut it as wide as you want. We got about 4 or 5 from each t-shirt so we are totally stocked up. Because of how long they are we either wrap them around our heads twice or we cut them and tie them! 


These bad boys are great for the summer when you don't want to fuss too much with your hair! They are great for working out as well as swimming! I think I might make a bunch for my Ragnar team for the race next week!

Wednesday, June 18, 2014

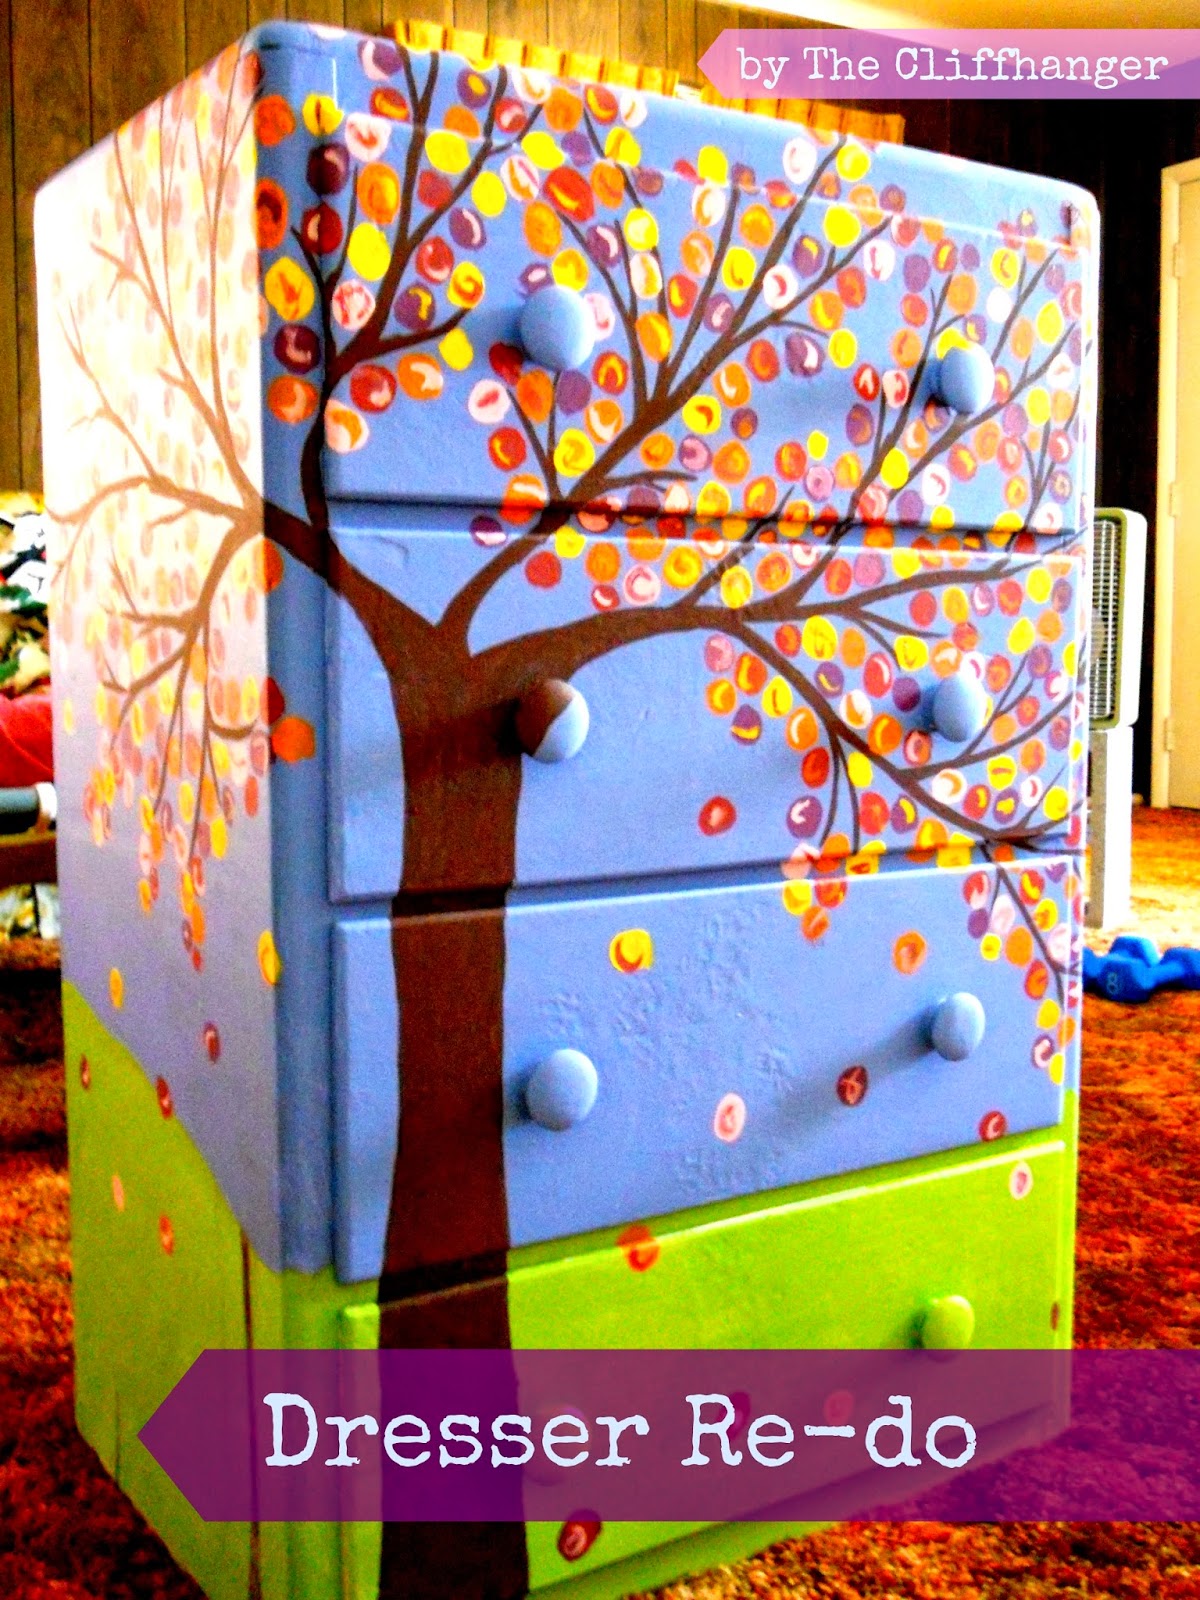
Tree Dresser Re-do!

We are throwing it back with this post to 2011 (hence the old school photos) when I refurbished my old dresser! I used cheapo acrylic paint from Walmart in assorted colors and then sealed it with polyurethane once it was dry.


The dresser used to be white, so I started by painting the whole thing blue, I then added green around the bottom as my grass. Then I put on the tree trunk and the branches. I didn't add much detail to the trunk or the grass because I wanted the focus to be on the leaves! Sorry about the poor photo quality, I took these with an OOOOOOld school flip phone!


I had a really hard time deciding which color family to do my leaves, soooo I kinda just used all of them! I mixed and matched colors that you wouldn't normally see on a tree and I am very happy with how it turned out.


I then let it dry and sealed it! Easy and so fun!! I want to do it again but I don't have room!

Tuesday, June 17, 2014

American Flag Door Hanger

What better way to start off The Cliffhanger than with this easy tutorial for an American flag door hanger!


I always feel very patriotic in the summertime and inspired to do American flag themed crafts, what with July 4th and Pioneer Day (Utah) both in the month of July. I made this in about half an hour from materials I already had! so it cost me $0!

All you need is ribbon and/or fabric scraps, a hanger and a pair of scissors.


First you need to decide how long you want the flag to be, I wanted mine to be about 20 inches from the base of the hanger to the bottom of the flag. Then cut strips of fabric that are the length of the flag times two. Cut them double the length of the flag so you can drape it or loop it over the hanger. I cut from a variety of fabric patterns and textures to help mix it up a little. 

I then cut the blue fabric half the length of the red and white fabric. I cut mine in different widths to add to the variety.

Now you just tie them to the hanger! I looped mine, but you could tie them or sew them or do whatever your heart tells you!


After spending time in Europe I am especially grateful for this country and the freedom that we enjoy. I am also grateful for free water with ice at every restaurant you go too... 'Merica.'